

Authentic tandoori chicken recipe, one of the popular Indian chicken leg recipes can be easily made at home (without tandoor) in the oven. Craving authentic Tandoori Chicken? Learn how to make this flavorful dish at home with our easy-to-follow recipe. No special equipment needed! Discover the secrets to juicy, tender chicken with a perfectly spiced marinade. Perfect for a weeknight dinner or a special occasion.

FEATURED COMMENT
![]() Just Amazing! I followed the recipe EXACTLY, and although the prep time is considerable, it is definitely worth the effort ten times over. I had a guest over for dinner and he was so impressed that he asked if he could take some for his lunch the next day!
Just Amazing! I followed the recipe EXACTLY, and although the prep time is considerable, it is definitely worth the effort ten times over. I had a guest over for dinner and he was so impressed that he asked if he could take some for his lunch the next day!
JEAN MITCHELL
What is tandoori chicken?
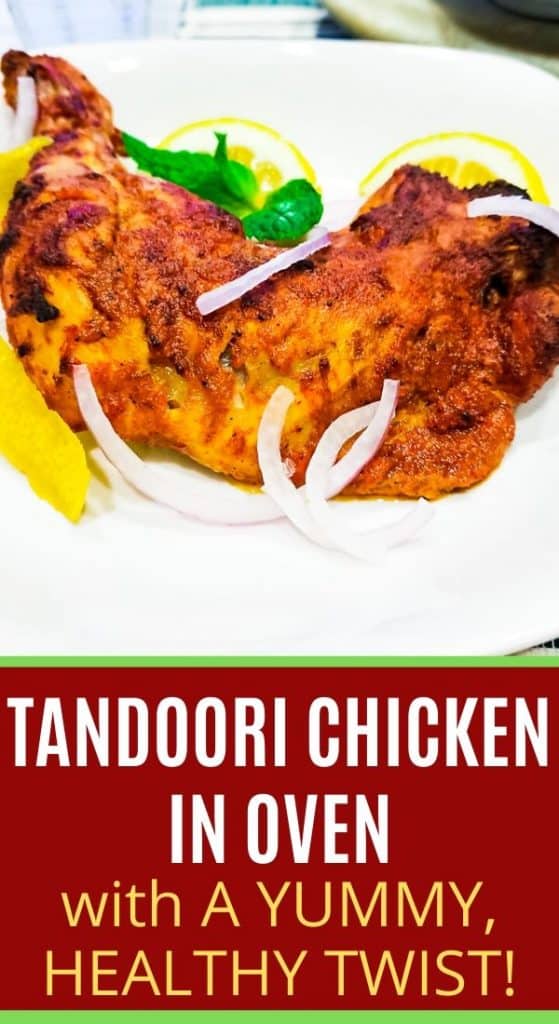
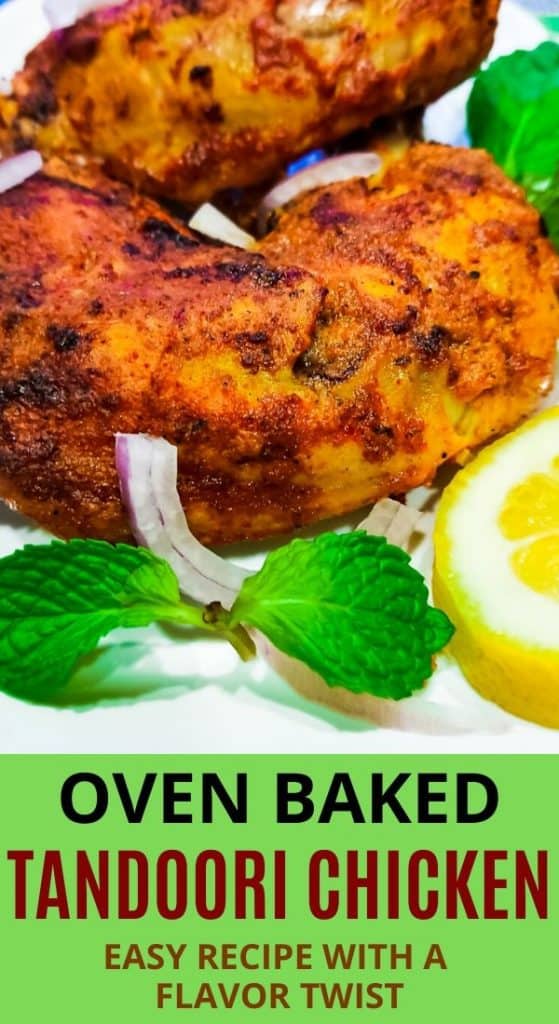
Authentic tandoori chicken needs no introduction. With its flavors of Indian spices and appetizing bright red color, you could never have missed it if you’ve visited Indian restaurants.
In restaurants, tandoori chicken is made by marinating a whole chicken in a spice mix (Tandoori masala), yogurt, lemon juice, ginger and garlic, and cooked in a Tandoor, a cylindrical clay oven at high temperatures.
In this easy recipe, we marinate chicken quarters (drumsticks with thighs attached) in the homemade tandoori paste overnight and roast them in the conventional oven. This is similar to my other tandoori recipes like tandoori pomfret and tandoori salmon.
A whole chicken, or cuts of chicken with bones like chicken drumsticks, chicken wings, or bone-in chicken thighs, can also be used. The cooking time and quantities need to be adjusted accordingly.

Why you’ll love this tandoori roast chicken
- This recipe will show you how to cook crispy baked chicken quarters that looks and tastes amazing, though it is not cooked in a tandoor.
- You are about to find out the little secrets of achieving uniquely spiced chicken and that appetizing bright red color without food coloring!
- Like all my other tandoori, tikka and kabab recipes, this tandoori chicken is also easy and straightforward.
- Apart from marinating overnight, this recipe doesn’t need much time or effort to cook but looks as though you spent hours in the kitchen. Who doesn’t love easy chicken recipes that you can make for a quick dinner?

A keto-friendly and gluten-free recipe and an easy menu for entertaining, you can also serve this as an appetizer with a fresh salad or raitha.
The only catch here is the marinating time which is a minimum of 2 hours. Once you prep well ahead of time (refrigerate or freeze a week to a month earlier), cooking takes less than an hour.
These tandoori chicken legs can be done in huge batches in the oven, thus saving a lot of time. (Like the sheet pan lemon garlic chicken legs.)
What cut of chicken to use
Chicken quarters (drumsticks with thighs attached) are the most commonly used, but you can also use cut-up drumsticks and thighs. Bone-in pieces work well since they don’t dry out easily in the oven.
Looking for a curry recipe with bone-in chicken thighs or drumsticks? You’ll love these marinated chicken curries: Kerala chicken curry with coconut and chicken pepper masala.
The skin is usually removed for tandoori chicken. Generally, you leave the skin on when roasting chicken so the moisture gets locked in. Here, the yogurt marinade does the same job, so you can save yourself from all that saturated fat in the skin.
Can chicken breasts be used for tandoori chicken recipe?
Unfortunately, chicken breasts are not suitable for this recipe. (Unless you cook them on a stove-top.) The chicken breast tends to dry out when cooked in the oven. If you want to bake chicken breasts in the oven, use this recipe for baked thin chicken breasts.

There’s another easy way out: Tenderize the chicken breasts before roasting in the oven as in recipes like baked tandoori chicken tikka, easy panko chicken breasts, or oven-baked hariyali chicken kababs.
Yet another smart way to cook chicken breasts is to mince, season, and shape them into meatballs and drop them into simmering creamy curry like the chicken meatball curry. Or use them as a filling for eggs as in keema chicken deviled eggs. You can also make chicken keema kababs with minced chicken breasts.
Video
Homemade tandoori marinade paste
Make your own tandoori chicken marinade because it is so easy to make and you can control what goes into it. Like the shawarma marinade, it literally takes 5 minutes to put together. The store-bought ones may contain food coloring and the spice levels may not suit your preferences.
This homemade tandoori paste recipe uses chili powder, Kashmiri chilli powder, coriander powder, turmeric powder, garam masala, cumin powder, garlic powder and salt. Add yogurt, lemon juice, ginger-garlic paste and oil to the masala and you get the flavorful marinade.

How to make authentic tandoori chicken- step by step
(You can find the exact measurements and instructions in the printable recipe card at the end of this page. Here are step-by-step instructions with pictures to help you easily understand the recipe.)
How to marinate the chicken
Trim off the skin and fat and clean the chicken legs. For the last rinse, mix the chicken legs with 1/2 teaspoon of turmeric powder and wash. This helps disinfect the chicken and also gives a yellow tint, to start with.
Make a few deep cuts on each chicken leg, perpendicular to the bones. This helps the marinade penetrate the flesh, or else you’ll be left with tandoori chicken that’s flavorful on the outside but bland on the inside.
Once you mix all the ingredients for the marinade, use your fingers to thoroughly rub the chicken legs with the marinade.


Leave the marinated chicken in the refrigerator overnight for the best results. The spices get completely absorbed by the chicken which is also tenderized by the yogurt-lemon marinade, resulting in flavorful, juicy chicken. If time is a constraint, marinate for at least 2 hours. The longer you marinate, the better.
How to roast the chicken legs


- Remove the chicken from the refrigerator 30 minutes before you start cooking. Preheat the oven to 230°C / 446°F. Place the chicken legs in a roasting pan lined with parchment paper.
- Set the oven to “roast” mode and cook for 15 minutes. Flip the chicken legs and baste with the juices in the pan. Cook for another 15 minutes.
- Baste the chicken legs with a little butter and change the setting to “broil“. Cook for 5 to 7 minutes, until browned to your satisfaction. Broiling will help you get the characteristic charred look on the Tandoori chicken.
Remove from the oven. Let it stand for 5 minutes and drain on paper towels.

Recipe tips
- A healthy way to add bright red color to the tandoori chicken is to add Kashmiri chili powder to the tandoori masala, which gives the characteristic red color without being too spicy. Missing in your pantry? The closest alternative would be smoked paprika.
- Another tip for restaurant-quality tandoori chicken: Heat 2 teaspoons of mustard oil and mix it with Kashmiri chilli powder. Cool it completely before adding to other ingredients in the marinade. This gives the characteristic ‘smoky’ flavor and also a brighter color.
- One more tip for an authentic tandoori chicken recipe: Smoke the tandoori chicken legs with cinnamon after taking them out of the oven. Check out how to do it in tandoori chicken tikka recipe (click here).
- Another ingredient that gives a “wow” factor to this recipe is garlic powder. The traditional recipe does not use garlic powder, but adding a teaspoon of garlic powder to the tandoori masala makes a world of difference.
- Want your tandoori chicken nicely and evenly browned? Baste with a little butter before you start broiling.
- Leftovers? Get creative: Shred the chicken legs and use it in chicken tandoori salad, instead of making chicken tikka from scratch!

Common Questions about Roast Tandoori Chicken Legs
What flavor is tandoori chicken?
Tandoori chicken is a combination of spicy and zesty flavors, predominantly yogurt, lemon, ginger and garlic with typical Indian spices chili powder, coriander, turmeric, cumin and garam masala.
Is tandoori chicken healthy?
The nutritional value of tandoori chicken depends on how you cook it and how much fat is used. This oven-roasted recipe results in tandoori chicken that is not only high in protein but also less in fat and calories than the fried version. It also has less saturated fat than those roasted versions with skin.
Why is my tandoori chicken dry?
The temperature and time of roasting are important. Chicken that is overcooked or cooked at a low temperature tends to dry out. Ensure that you roast for the first 30 minutes then broil for 15 minutes to lock in the moisture and brown the chicken at the same time. Also, do not forget to baste with the pan juices every 10 to 15 minutes.
What to serve with tandoori chicken?
Chutneys
Tandoori chicken can also be shredded and used in chicken tikka wraps with any of the chutneys.
Typically, tandoori chicken is served with cilantro mint chutney or cucumber raitha. It also tastes great with avocado green chutney, date and tamarind chutney or green mango chutney.


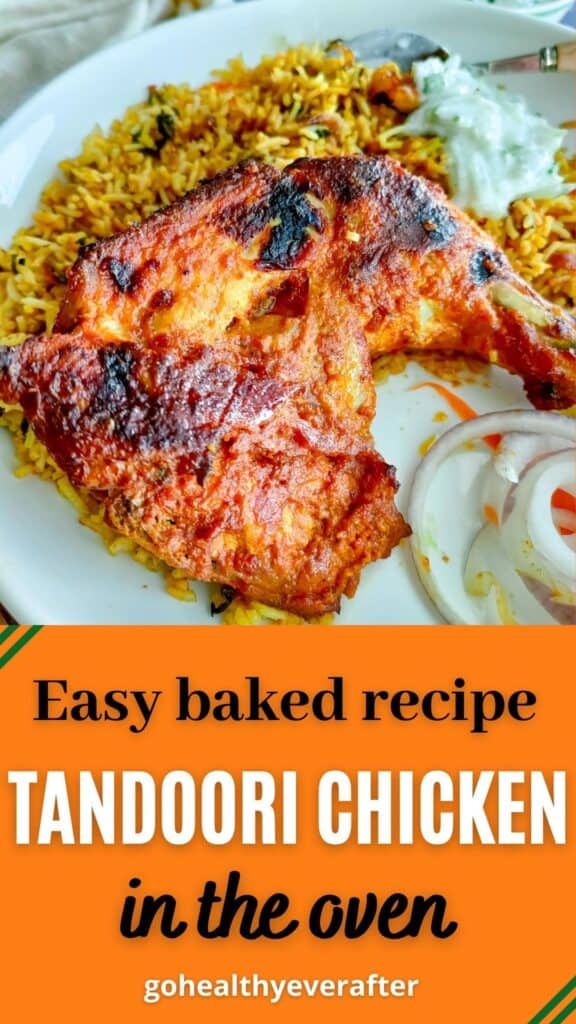
Flavored rice
Planning to feed a crowd with an Indian-style Thanksgiving (or any holiday) menu? Serve this easy tandoori chicken with rice:
- biriyani or saffron rice (classic Indian cuisine)
- lemon-flavored brown rice
- rice and curry, like chana masala or spinach dal
- coconut cauliflower rice for a keto low-carb option.
Fresh salads
Restaurants serve tandoori chicken with onion and lemon slices. Why not try it with these salads for a change? Healthier and yummier!


You can also pair these tandoori chicken legs with a fruit salad like the mango pomegranate salad.
Meal prep option
DO NOT FREEZE the cooked chicken. You will lose the texture of the meat and it becomes tough when reheated.
We have an option, though. The marinated chicken legs may be refrigerated for upto 3 days or frozen for upto a month and then thawed overnight in the refrigerator. Ensure that you keep the chicken out of the fridge 30 minutes before cooking.
Looking for vegetarian tandoori recipes? Try these roasted tandoori cauliflower wings , easy tandoori paneer tikka, or the flavorful hariyali paneer tikka.
Love seafood and tandoori flavors? Check out tandoori salmon and easy tandoori prawn tikka.
More chicken recipes
Looking for easy saucy chicken recipes? You might love balsamic chicken with rosemary sauce and lemon coriander chicken with yogurt sauce.


Authentic Tandoori Chicken Recipe
Equipment
Ingredients
- 4 chicken leg quarters 250 grams or 9 ounces each
- 1 tablespoon sunflower oil or cooking oil of your choice
- 1 teaspoon butter to baste
Tandoori chicken marinade
- 1/2 cup plain yogurt
- 1 tablespoon lemon juice
- 2 teaspoons ginger-garlic paste
- 1 teaspoon chili powder
- 1 teaspoon Kashmiri chili powder
- 1 1/2 teaspoons coriander powder
- 1/4 teaspoon turmeric powder
- 1 teaspoon garam masala
- 1 teaspoon cumin powder
- 1 teaspoon garlic powder
- 1 teaspoon salt
To serve
- 1 Carrot shredded
- 1 onion thinly sliced
STEP BY STEP IMAGES
Scroll back to find detailed recipe photos!
Instructions
- Mix all the ingredients for the tandoori marinade in a small bowl.
- Make small cuts in the fleshy parts of the chicken legs using kitchen scissors. Coat the chicken with the tandoori marinade.
- Marinate in the refrigerator overnight or for a minimum of 2 hours.
- Preheat the oven to 230°C / 446°F.
- Place the chicken legs in a roasting pan or sheet pan lined with parchment paper.
- Set the oven to "roast" mode and cook for 15 minutes. Flip the chicken legs and baste with the pan juices. Cook for another 15 minutes.
- Remove the pan from the oven. Baste the chicken legs with butter.
- Change the oven setting to "broil" and return the sheet pan to the oven. Cook for 5 to 7 minutes, until browned to your satisfaction.
- Remove the tandoori chicken from the oven and let it stand for 5 minutes.
- Serve your perfectly browned tandoori chicken legs with restaurant-style green chutney!
Video
Notes
- This recipe uses chicken leg quarters which are drumsticks with thighs attached. The measurements and cooking time are based on the size of chicken legs as mentioned in this recipe.
- You can also use individual pieces of drumsticks or thighs. Decrease the roasting time and broiling time by 5 minutes each. So it would be 25 minutes of total roasting time plus 10 minutes of broiling.
- Marinate the chicken legs overnight, or at least for 2 hours. The longer you marinate, the better.
- Make-ahead option: The marinated chicken legs can be refrigerated for 3 to 4 days or frozen for a week. Thaw the frozen legs overnight in the refrigerator. Leave the chicken legs out of the fridge 30 minutes before cooking.
- Kashmiri chili powder gives the Tandoori chicken its characteristic bright red color. It looks a few shades darker than chili powder, but without the heat.
- Do this for a ‘smoky’ tandoori flavor (restaurant-style) and even brighter color: Heat 2 teaspoons of mustard oil and mix it with Kashmiri chilli powder. Cool it completely before adding to the marinade. Proceed as per the instructions.
- One more tip for an authentic tandoori chicken recipe: Smoke the tandoori chicken legs with cinnamon after taking them out of the oven. Check out how to do it in tandoori chicken tikka recipe (click here).
- Basting the chicken legs with a little butter before broiling gives perfectly browned tandoori chicken.
- Smoked paprika can be used instead of Kashmiri chili powder.
- Cayenne pepper can be used instead of chili powder.
 The nutrition information assumes that all of the marinade is consumed. However, apparently, it is not the case.
★★★★★Did you try this recipe? Please give a star rating in the comments below ★★★★★
HUNGRY FOR MORE? Join over 1000 home cooks like you who subscribe to my weekly newsletter to get all the latest recipes right in your inbox. Or follow me on your favorite social media: Facebook, Pinterest, Instagram, and YouTube. Thank you and happy cooking!

Do u add hing to mustard oil?
No, there’s no hing in tandoori marinade recipe.
Just Amazing! I followed the recipe EXACTLY, and although the prep time is considerable, it is definitely worth the effort ten times over. I had a guest over for dinner and he was so impressed that he asked if he could take some for his lunch the next day! I served the tandoori chicken with a Mexican corn salad and an arugula cucumber salad. What a great combination of wonderful flavors. I thought I was sitting at a 5 star restaurant! Thanks again for the recipe and I look forward to trying others.
LJean
Hey Jean, thank you for the lovely comment and rating! That motivates me to come up with more exciting recipes 🙂
Something got messed up. I did everything to a T from your recipe but the chicken never charred. In fact after 45 mins it still has the liquid gravy on it
Hi Ashwini,
Thanks for taking the time to try the recipe and give feedback. I’m sorry it didn’t come out right for you.
The type of oven you used or the size of the chicken legs may be different.
Please take note of a couple of things when you do it next time:
Place the roasting tray in the upper half of the oven.
Shake off the excess marinade before placing the chicken legs on the roasting pan.
Broil for 5 to 10 more minutes until charred.
Thanks Sheeba. It was much better this time.
You’re welcome, Ashwini! I’m happy it worked for you this time.
Best recipe for chicken!
Thank you, Dave!